DIY Energy Tips: Insulating Boiler Pipe
Winter is again upon us! As if COVID wasn’t enough, many of us have to deal with drafty old homes and fearsome energy bills. Fortunately, there are a few ways to save some money that make for a fun (N.b. “not awful”) Saturday afternoon project.
To Steam, Or Not To Steam? Boilers 101
First off: why boilers versus forced-air furnaces? Water is a far more efficient medium in which to distribute heat because it has a higher thermal mass than air. Various heating systems are more prevalent in some regions than in others, but, by and large, the midcentury in the United States saw a large shift from boilers to forced-air. The latter is “better” in that forced-air furnaces are somewhat less of a pain in the ass. They heat up spaces faster. Because we experience space mostly through air— on our skin, for example, as opposed to on our feet, which are usually wearing socks or shoes (we are a shoeless house and I grew up in a shoeless house, but socks, certainly)- forced air is the fastest way to make that, uh, experiential fluid of air, if you will, more temperate.
Is this a good thing? Some might argue that yes, because forced-air furnaces running at 96% efficient are way more efficient than a 78% efficient boiler. This is thermodynamically true. In practice, there’s a confounding factor here in the high percentage of heat losses in any building to drafts, which make forced-air less efficient, BTU per BTU, than hydronic heat, which uses conductive and radiative heat transfer. (But that, as they say, is a whole ‘nother can of worms). Most generally, though, I ascribe to the maxim that if it ain’t broke, don’t fix it. Second, replacing a boiler with forced-air means slicing and dicing your house with some boxy, invasive ductwork. It can be done elegantly. But you know what can also be done elegantly? Ductless systems. (Mic drop!).
Major Home Repair: To Go Gas-Free, Perchance To Dream?
Steam vs. Hot Water
Anyway, boilers come in two main forms– steam and hot water. You’ll know hot water boilers because the systems have a manifold and loops, each of which have a little pump. Also because the radiators have an “in” and an “out.” Steam radiators only have one “port.” With steam, the water is boiled and it expands, even the relatively low pressure filling the whole system. (There are more obscure systems like hydronic forced air combo systems, in which the boiler supplies both domestic hot water and heating through an air exchanger– less relevant for our purposes). If you don’t have a boiler, you can still insulate ducts, but this is only valuable if the ducts are running through unconditioned (unheated or uncooled) space.
I will tell you that I have used a few different types of pipe insulation on this project, and they’ve all performed somewhat differently. Flexible insulation– or the technical term, “smooshy”- comes in a few different materials. I’m including the links so you know what they are and in case you are for some reason unable to shop at your local hardware store, but please, for heaven’s sake, shop local whenever possible.
Material List
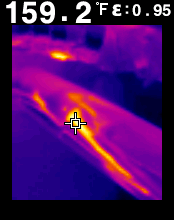
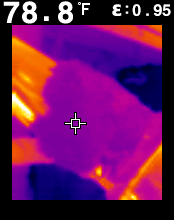
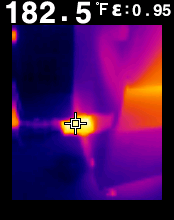
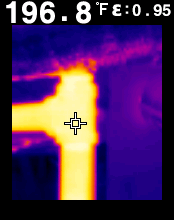
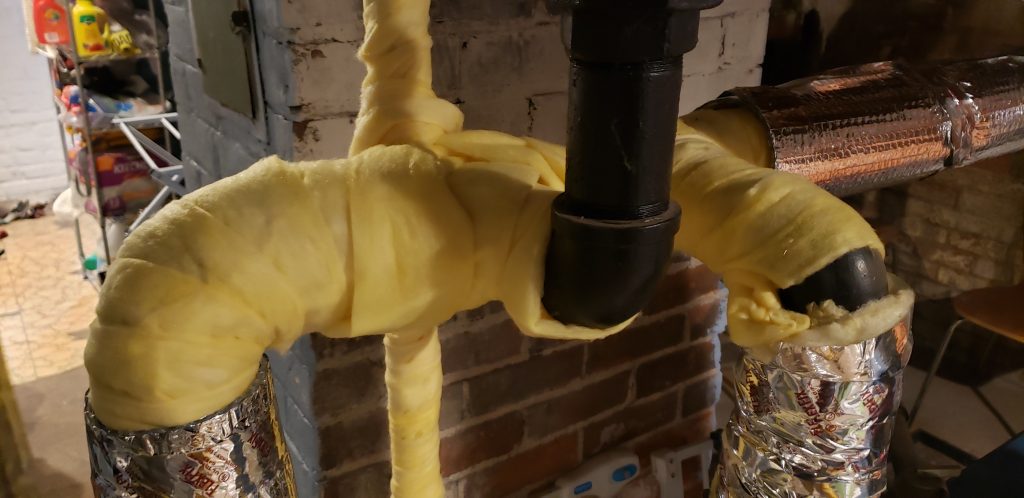
- Fiberglass pipe wrap: You shall know this usually by its pink or yellow color. ($5.15 on Amazon, usually cheaper at your local hardware store– I paid like $3.67 a roll). Ideally, you’ll have at least two layers of this. It’s ok for the pipes to be warm to the touch, but you want to reduce the ambient temperature around the pipes from 192°F (near boiling, 87°C) to, say, more like 70-80°F (21-29°C).
- Rockwool/roxul/mineral wool (if not fiberglass): This is like fiberglass’s bougie cousin from New England, which I prefer with one caveat. It’s somewhat harder to work with– being denser, it’s a bit harder to smoosh or bend. This is the best bang for your buck as far as dollars per r-value– you just have to figure out how to tightly wrap it around the pipes.
- Radiant barriers ($66.89 on Amazon, 33 cents per square foot, comparably priced at your local hardware store, if they carry it). These are the rolls of reflective bubble wrap. You know, the blankets that astronauts wear, or whatever. They’re honestly a little bit tricky to install as described on the packaging with outlandish R-values. The idea is to reflect heat– but this requires a layer of air. On their own, they provide minimal insulating power. They are, however, nice to have as a top layer for the fiberglass, to encapsulate forevermore the pipes underneath.
- A knife, razor, or pair of scissors. They’re cheap and it’s always good to have a billion on hand. Just don’t, you know, use your roommate’s fabric scissors.
- Nashua FlexFix or comparable ($6.33-9.81 on Amazon, way cheaper at your local store). You want the really thin stuff that meant for ducts– not “duct tape” with the gooey adhesive.
Unsuitable materials
- Polyethylene foam: You may know this as the material used to make pool noodles. In its black, tubular form, it’s used as pipe insulation– for cold water. Polyethylene’s melting point– or at least deformation point- is in the 200-some degrees F range.
- Synthetic rubbers: You don’t want to use these as they will also start softening and melting in the 200-some degrees F range. Synthetic rubbers, look for words like “butyl,” “styrene,” or “nitrile.” Butyl gaskets are used in a variety of construction applications, and are often sold as pipe wrap, but they are not suitable for boiler pipe because of the temperature issue.
- Before putting anything near a flue pipe, make sure you know what you’re doing. We have a double-walled flue pipe into a lined chimney. This doesn’t get hotter than a couple hundred degrees, so rockwool is a suitable material, as it can withstand thousand degree heat. I wouldn’t use fiberglass because I’m paranoid about the chemical binders in it, but fiberglass is technically rated for high temperatures as well. An uninsulated flue pipe could be several hundred degrees. Under no circumstances should you put any sort of synthetic rubber, plastic, or paper anywhere near a flue pipe.
Safety first!
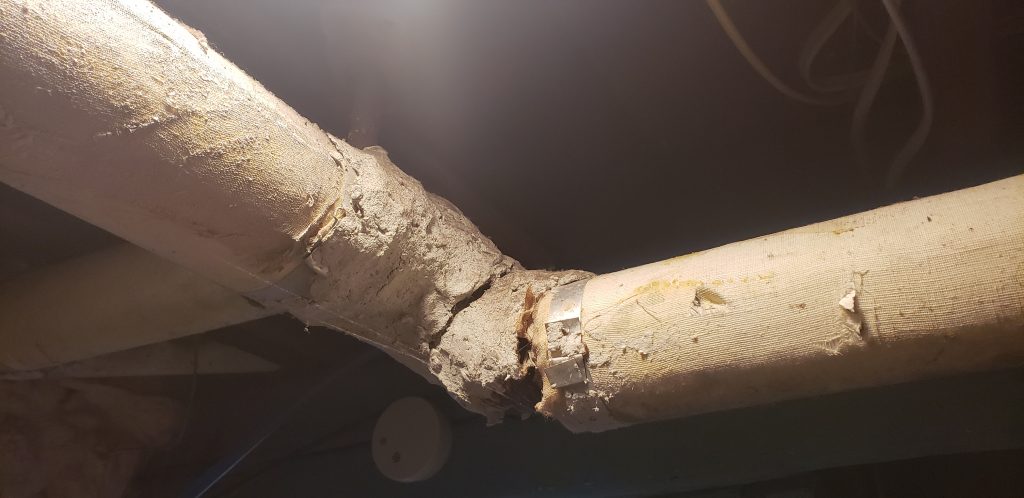
First, ascertain whether you’re working around asbestos. Asbestos pipe insulation was used on hot water pipes for many years. Potential asbestos pipe insulation is identified by the presence of chunky white bits around pipes, sometimes wrapped in white, lagging cloth. While it’s fine to leave it in place intact, asbestos, like a sleeping dragon, is dangerous if disturbed. It’s not legal in many jurisdictions to bust up asbestos by your lonesome. But if you do, you should be wearing a P100 mask, full skin protection, and a full host of other protections (negative pressurization, etc.).
And as far as your new insulation? Always wear a mask of some sort when working with fiberglass. You don’t want to get, you know, pneumonoultramicroscopicsilicovolcanoconiosis, or something. In all seriousness, though, fiberglass, when broken or cut, releases very small particles. They’re not as bad as asbestos, sure, but they’re certainly not something you want to be breathing in. Fiberglass also contains binding agents that may release styrenes or urea formaldehyde, both of which are carcinogenic and toxic. When in doubt, call the manufacturer and ask what nasty bits are put into their product!
Skin protection
Fiberglass is very, very itchy. “Itch-free” fiberglass is an industry lie, much like other industry lies– “easy cleanup with soap and water,” for example, labeled on that can of Zinsser Shellac that you’ve been trying to scrub off your fingernails for the past month. Never worry– just wear gloves. Disposable rubber or plastic gloves are easy enough, but most nitrile, kevlar (cut-protective), or other work gloves should be suitable as well. Fiberglass can also get all over your clothes, so, make sure you warsh them after you’re done! Rock wool can also make a mess, but it’s not anywhere near as itchy.
And, last, but not least, clean up the surrounding area, preferably with a HEPA vacuum.
And savings, of course, after that
I think in our worst winter, we spent $400-some on our utility bill. The problem is, it’s hard to figure how much of that was from heating and how much was from our electric dryer. A load in an electric dryer, depending on the cycle, costs somewhere from 30-60 cents. That’s a lot of money when you have a house of five people, two of whom work out regularly, one of whom does part-time work in construction, and two of whom cohabitate with dogs who shed on literally everything. Suffice it to say, though, a big chunk of that bill is from the heating.
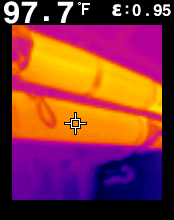
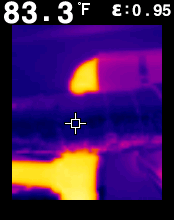
The ambient air around the boiler is now around 65 degrees instead of 80 degrees. This suggests, based on some napkin math, that we’ve probably upped the efficiency of every boiler cycle by several percentage points. I will report back to see how we make it through the winter. In the mean time, get started on your pipe insulation project! It’s a great non-COVID-related use for a face mask!