
Old House Love: Ditch The Chemical Floor Finishes
I’ve often observed that next to perhaps the banking industry, construction is one of the most stubborn fields. The mantra is basically, “Why would we change the way we’ve been doing it for so long?” For some things, this makes sense. But times change. Some innovation is great. Some innovation is bad. In this case, I’m looking at why you should ditch the nasty chemical wood floor finishes that have been popular for so long– and what alternatives you should consider. TLDR: Polyurethane barrier varnishes are out! All-natural, nontoxic, zero-VOC linseed oil finishes are in– in this case, by Mars, Pennsylvania-based Tried & True Wood Finishes.
Flashback: The Quest For A Natural Finish
In 2011-2012, I worked in a woodshop in St. Louis. The proprietor was a master of finishes. He would build improbably complex things out of MDF and finish them with lurid and captivating colors and sheens that made me question the nature of my reality. He also didn’t like this cheeky young hipster poking about the shop, asking him questions all the time and challenging his worldview. Of course, I was mostly there to learn– but it isn’t easy to get a bunch of stubborn old woodworkers to teach you things. For learning, there are books and there is YouTube and there are endless online forums.
Jim’s major beef with me was that all of this “green” talk was ridiculous. He had learned the correct steps from the great masters, and he didn’t need to be asked– or certainly told- about “environmentally-friendly” finishes. All finishes, he said, are dissolved in napthalene! (This isn’t true). Doesn’t matter what the finishes are! They’re all dissolved in napthalene! You damn communist millennials and your idealism!
I didn’t accept that, and I knew that his comment about napthalene was also factually incorrect. Still, Jim was a master craftsman and I was young and foolish, so, ya know. I was, however, determined to figure out the gaps in knowledge, specifically thinking about what these apparently-forgotten finishing techniques were. Thus began a long process of learning about how this stuff actually works. (Also, I’d like to say for the record that Jim was a solid mentor in many ways and taught me some things and he makes some amazing stuff and still knows way more than I do about most of this stuff. Except the napthalene).
Floor Refinishing 101
Barring water damage or fire, a hardwood floor– or softwood floor, for that matter- ideally lasts for centuries. (Apparently dropping an iMac onto a hardwood floor from about ten feet will also crack the boards! Who knew?). How do you refinish a hardwood floor? Ideally, you need three machines, but no less than two– a drum sander and an edge sander. The drum sander weighs about a hundred million pounds. Once you haul it into the house (the hard part), it’s easy enough to use (with a few caveats). Using the edger, on the other hand, is truly backbreaking work– if you’re looking for an arm workout that will leave your shoulders and entire back cripplingly sore for days. It is no joke. Then you need a bunch of sandpaper. You work your way from a low grit (rough, to remove material) to a high grit (smooth finish). You alternate between the edger and the drum. You go back and forth. You work your way up to the finest grit. By this time, the sun has set. You’ve cursed the gods and cracked open a beer. (There are YouTube videos! Check ’em out!).
Then you get to the fun part, which involves the finish. This involves a painstaking process of making sure the floor is clear of all dust. And this is where our story really begins– or where a path diverges, you know, in an American hard wood, and I take the one less traveled.
The conventional way to finish floors these days is to use polyurethane dissolved in some mixture of petroleum distillates. Polyurethane (from the Greek for *checks notes* many urethanes) is a miracle chemical in many ways. It is the basis for many important plastics and foams that find widespread everyday use in home and industry. But it’s not the best floor finish.
Why not polyurethane?
Because it’s essentially plastic dissolved in, well, something like gasoline. Toxic chemicals are bad news. There’s also the actual chemical process involved. Polyurethane is what’s known as a barrier finish. You’re essentially creating a film on top of the wood. The idea of using solvents as a carrier means that the polyurethane mixes better and penetrates into the wood better. But at the end of the day, it’s still basically just a covering. Polyurethane doesn’t mix with wood– it’s a chemical layer of icing atop a cake of natural ingredients.
Is it durable? I mean, kind of? Polyurethane can hold up well for a decent amount of time. Unfortunately, it’s not really that hard, and as a barrier finish, it’s not really chemically binded to the wood– it’s just cured on top of the wood. Manufacturers have started putting aluminum oxide in finishes to make them harder (ruby, corundum, sapphire– remember high school science class?), and it is debatable whether this actually works when suspended in a solution of, well, plastic. This is also the case for prefinished wood, which looks ever so shiny but also wears terribly with heavy traffic (though it might take several years of heavy wear in a regular residential setting). As Tried & True notes:
“In order to return a floor finished with polyurethane or catalyzed varnish to its original state you must strip the old finish off completely and then refinish the whole floor. Would you rather have to refinish your entire floor every 5-7 years or only need to touch it up from time to time?”
Starting the application
To be clear, I know about how this works because I really screwed this up the first time I used it. I didn’t really understand the meticulous step-by-step order of operations involved in the application, because that guide didn’t exist at the time, so I winged it. And I winged it, well, poorly. I didn’t ruin the wood, but I also didn’t apply it properly. If you’re new to this whole thing: watch some YouTube videos. Read some articles. And then read this article. And then revisit some more YouTube videos. Then, average the sum total of knowledge and get started.
Step-by-step here:
- Finish sanding the floor. Make sure you’ve gotten out all of the swirl marks from the edger, and that you’ve gotten everything to a super smooth grit. Most Home Depot grade sandpaper goes up to 100 or 120 grit. Buy a bunch of higher-grit– 220 or 320 or 400 or 600– and sand it by hand with an orbital sander. Put on some headphones and listen to a good book. Oh, and wear a freaking respirator. Make sure the doors are sealed, or your entire house will be filled with tiny wood dust particles forevermore. As for swirl marks, they happen, but you just want to avoid what I call the Slumlord Guilloché, that is, a repetitive pattern of swirls that indicate that someone really didn’t know what they were doing.
- When you’re done with this, clean up all of the wood dust.
- Seriously, is all of the wood dust gone? If not, go back to step #2.
- Revisit the previous step in case you think I’m kidding.
- Use a light cut of shellac as a sanding sealer. (You can buy shellac flakes and mix them with denatured alcohol or you can buy the premixed Zinsser stuff— in the “wood finishes” section of the hardware store- and dilute it as needed). Denatured alcohol is also great for both cleaning and priming for the finish– suspended in the same solvent. A “cut” of shellac refers to the ratio of shellac to gallons of solvent. Since we’re freedom-loving Americans who will use anything to measure except the metric system, the ratio is usually in pounds to gallons. Tried & True recommends 1 1/2 lbs. of dewaxed shellac to 1 gallon of alcohol. I can never remember what cut the Zinsser stuff is, so I usually use a 1-1 ratio of shellac (Zinsser’s yellow can) and denatured alcohol and– do two coats on oak.
- You will need to repeat Step #5, the sanding sealer, for open-grained woods like oak.
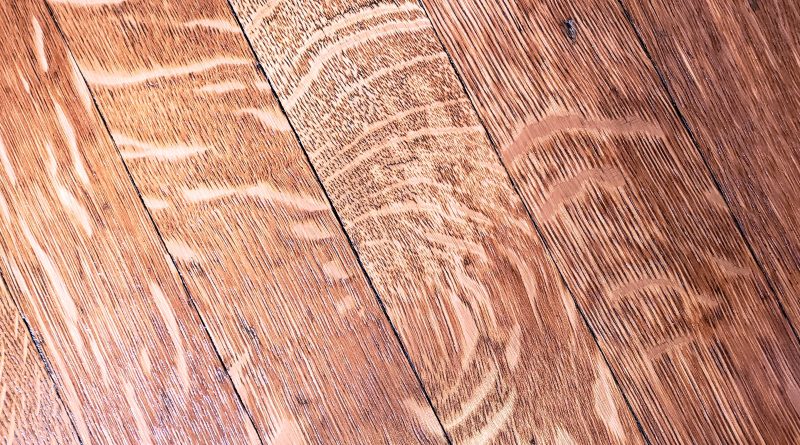
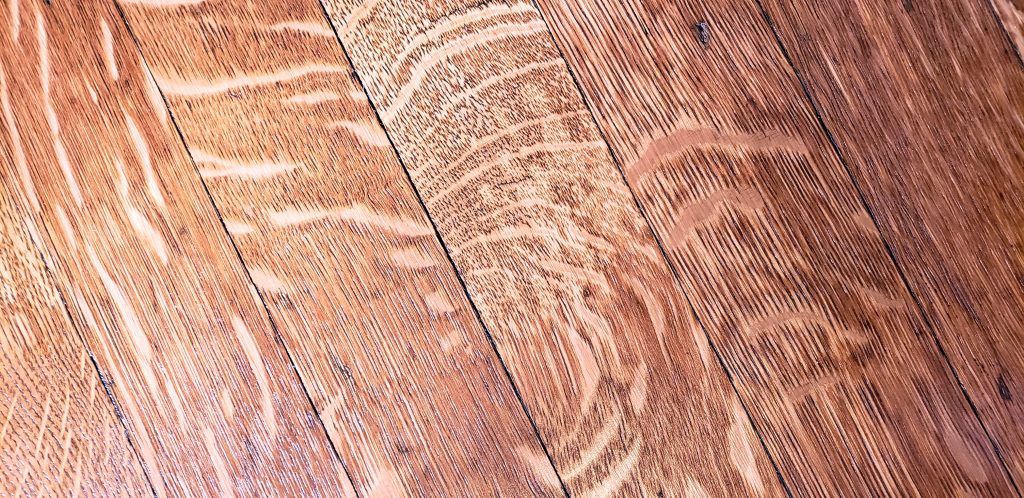
- Apply a thin coat of the Danish oil. If you’re used to conventional varnishes that use a solvent as a carrier, you’ll need to rethink this. Conventional varnishes require you to basically flood the surface on the first coat and then wipe off excess later. In this case, you want to cover the surface entirely, but only such that it absorbs fully into the surface. You don’t want to be sponging up large amounts of goop. Also, note that uneven, open-grained woods will absorb oil at very different rates versus something much more even like cherry or maple or a softwood. (I just did this on an oak floor that included some quartersawn boards and it was basically striped). Let this sit overnight.
- Buff. I bought this buffer for about $25. It is a complete piece of garbage. It gets hot and smells like burned motor when you use it for an hour straight. But it works. There are other ones that get decent reviews and are still cheap. Or, just do the damn thing and buy a DeWalt. The “buffer/polisher” usually has a random orbital action, similar to the eponymous sander, but these are small potatoes compared to a proper floor buffer machine, which you’d have to rent from Home Depot. They have a gentle orbital action that does not smoosh while it spins like a random orbital one does, but this allow you to use large sanding screens to get a glassy smooth finish on hardwood floors (I used to own one. It was stolen, like most of my dreams). The giant buffer is also heavy. Heavy means more smooshing of more oil molecules into more wood fibers. Or whatever is happening down there. You can’t put much weight on the cheap sanders because it will burn out the motor. They’re not really comparable, but I just mention this for the sake of comparison.
- Following this step, Tried & True advises that you burnish the wood with a fine steel wool. They say that this will smoosh down the ends of the wood fibers and make them more receptive to coats of the varnish oil. You can also achieve similar results with a rough buffing pad or fine grit sandpaper. But be careful with this one, as non-wet sandpaper will clog quickly (Update: Josh Hudac of Tried & True recommends against this given the possibility of using too aggressive an action with sandpaper. He says steel wool remains the best bet). You can smoosh steel wool into a buffer pad and use that, or you can use a very fine sanding screen. As always, make sure you’re clearing the floor of dust. Cotton rags– old t-shirts, especially- are a good call to have on hand for this purpose.
- Following this coat of the Danish oil, switch to the heavier-duty varnish oil. This goes on super thick! So, you won’t need to use much of it at all. Again, you want to make sure that you’re covering the wood in its entirety, but just barely. You don’t want a layer of finish, you just want it to barely be, well, damp, in oily terms– as though you rubbed a slightly greasy finger over the wood and you can just barely see the oil. Cotton rags are useful for this purpose, but they do absorb a lot of oil, so bear this in mind. I usually use a regular teaspoon to apply it to the floor (it’s that thick) and spread it around.
- I typically will buff this with the hand buffer, which might take 10-25 minutes per room, to make sure everything is even and not applied too heavy. Then, I let this sit overnight and then buff it the next day, either with the hand buffer using a soft pad, or with a rougher buffing pad (like the red or white, nonwoven ones that look sort of like those activated carbon air filters– I bought three of these for the whole project for about $25 and am able to use them again). This step may or may not be necessary, but I find that the use of the rougher pads is perhaps similar to the steel wool because the lightly abrasive action– not enough to scuff the finish, by any means- helps any remaining bits of excess finish penetrate into the floor. The pads are also very porous and so will absorb excess, too. But in general, this is an incidental benefit, and you should count on using absorbent cotton rags to pick up excess oil.
- I like to repeat the varnish oil step at least two more times, a total of three top coats on top of the Danish oil. For a single room, this can be done in 30-60 minutes, depending on the size of the room. The longer you wait for it to cure, the harder the finish gets. This means that if you have the time, wait an extra day or so. In comparison, cheap contractors will do two coats of polyurethane, and the house stinks of offgassing VOC’s for weeks and weeks. Compare those two.
- I have, as a test material in some spots, used Tried & True’s “Original” finish, which is linseed oil mixed with beeswax, as a topcoat. Wax is generally the only non-negotiable finish layer, as you can’t readily redo it or recoat on top of it. It does, however, wear off over time. This stuff smells lovely and makes your hands feel great. It’s almost like using natural materials is, well, actually better than using petroleum distillates? Huh.
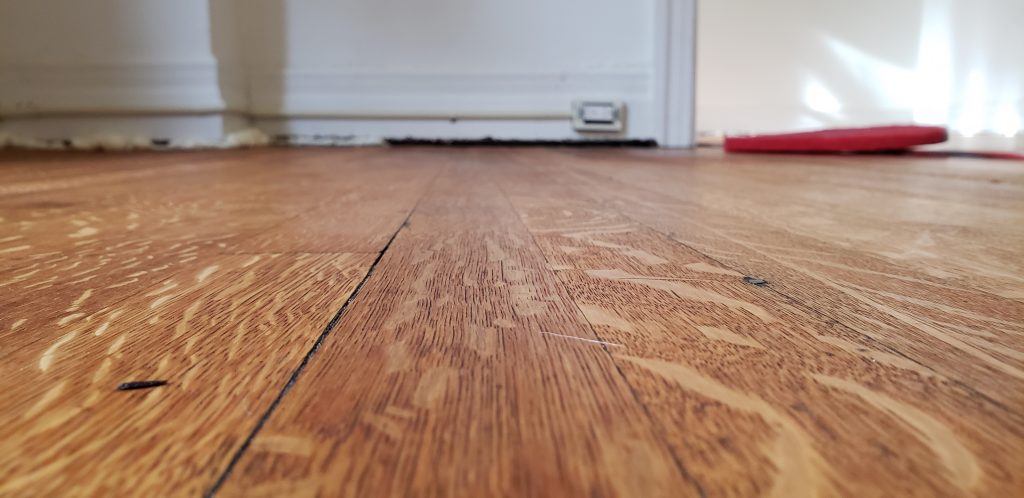
Now, your floor is done! The nice thing about this finish is that it is super hard. If you scuff it or scratch it, it won’t ruin the finish– like basic scuffs have done to the high-gloss poly in our foyer (done before we moved in). Rather, you can just go over it and rub in some more oil by hand. This finish has held up to some heavy-ass furniture (though always use felt pads!). It’s survived falling hammers, construction objects of unknown origin, and wheels of desk chairs.
Josh Hudac of Tried & True writes to us about the importance of burnishing with steel wool, saying that the reason why the thin coats are so important is, in fact, a matter of chemical oxidation involved in curing (polymerizing) the oils:
These microscopic scratches created when burnishing also create tiny channels for oxygen to reach any uncured pockets of oil that became trapped under the already cured and expanded material at the very surface. This is important to remember since the process by which linseed oil cures is an oxidative polymerization; meaning that the individual oil molecules need fresh oxygen to cure; linseed oil actually increases its weight by 17% (our Danish Oil is technically 117% solids) when it cures as well as a smaller degree of volume increase. This is why multiple coats are required instead of one thick coat. When it is applied too thickly, the material at the top absorbs oxygen and expands which prevents the oxygen molecules from reaching the oil below.
Safety First
Solvent-soaked rags can spontaneously combust. Oil-soaked rags may also be able to combust, though I’ve never seen this happen. Store all used, solvent-soaked rags in an airtight container! Oil-soaked rags will become stiff in about a week at room temperature as the oil cures, at which time they are not dangerous or, well, spontaneously combustible. Wear a P100 (pink cartridge) NIOSH respirator. If you’re sanding around lead, SEAL EVERYTHING OFF FIRST AND USE BEST PRACTICES TO CONTAIN LEAD DUST. Fortunately for you, the Tried & True finishes are 100% non-toxic, so you don’t need to worry about your house smelling like new car for weeks after you apply it. It will also leave your skin smooth and supple!
Use The Correct Terminologies
Yeah, I know I just got done with a whole section referring to “smooshing” wood fibers. Anyway, wow your friends at parties with the wealth of home improvement knowledge that you gleaned from the Handbuilt City. Flooring terms are frequently misused, just as flooring is often mis-finished. Know your materials! Respect the product of the natural environment! Understand your solvents!
- Hardwood refers specifically to hard woods– typically from deciduous (angiosperm) trees like what I call the noble hardwoods– maple, cherry, beech, walnut, or, the most common in North American residential construction, red oak. I’ve personally installed birch, beech, maple, walnut, hickory, and oak flooring. They’re all different and have different advantages and disadvantages. They also all finish very differently. Hickory is the only one I don’t particularly like working with because it’s extremely hard and this causes problems.
- Softwood refers to usually evergreen trees, or conifers (gymnosperms)– fir, pine, cypress, spruce. Softwoods are generally, but not always, softer than hardwoods. They’re also cheaper because the trees grow faster. The ease of working with softwoods– and the fast speed at which the trees grow- is why softwoods are the material for framing lumber. Southern Yellow Pine (SYP) is a common construction wood, but usually not used for flooring, for example.
- Heartwood, that is, the innermost portion of the tree, is usually harder– and darker- than the outside sapwood. This varies a lot from wood to wood, with some trees having very little variation and some trees having every stark contrasts. Walnut’s interior wood is a mauve, purplish-grey, while its much thinner outer layer is far lighter, like maple. You rarely see walnut sapwood except in things like walnut butcher blocks, where they include the sapwood 1) to save money and 2) create color variegation. Pine heartwood can be a rosy reddish hue compared to the creamy tan colors of the outer wood.
- Quartersawing means cutting through the tree at a straight angle– a direct, radial cut. This creates some stellar visual effects with some woods like maple, sycamore, and oak (rays, flecks, stripes). Because it’s a direct cut, this wood is far more stable to deformation. There is also less wood of this variety, so it’s more expensive.
- A stain is a pigment suspended typically in a solvent. People refer to “staining” the floor when they mean “finishing” the floor and this is an unfortunate error. Really, you don’t want to stain natural wood, in my opinion. I’m a purist like that. Except maybe walnut– which you can stain with natural walnut dye (didn’t see that one coming, I bet).
- Varnish is a wood finish usually comprising a drying oil mixed with a solvent. Danish oil is a type of varnish, although most commercial Danish oils usually contain a solvent, a drying oil, and a heavy metal drier (see next entry).
- Japan drier or heavy metal drier is a mixture of heavy metals dissolved in a solvent, and then typically added to a wood finish to help it cure faster. Cobalt is a popular constituent. Heavy metal driers are bad news and highly toxic, but they cure to an inert form. Still not something you want around.
- Lacquer is a finish comprising a resin dissolved in a solvent. Modern lacquers usually comprise an acrylic resin dissolved in a solvent. That solvent is usually some mixture of toluene, xylene, acetone, or other ketones or esters. “Lacquer thinner” is a generic coverall term for some mixture of the above.
- Shellac is basically insect poop of the lac beetle (kerria lacca). “Lac” derives from the same Sanskrit ‘laksha’ (लाक्षा) as in “lacquer,” which means something to the effect of “an approximate fuck ton.” Shellac is harvested into flakes and dissolved in a solvent, typically denatured alcohol (some mixture of methanol, ethanol, and something else like methyl ethyl ketone or methyl isobutyl ketone). Such alcohol is called “denatured” because one does not use it to get turnt, as is said to be the nature of ethyl alcohol. Shellac is used as both a top finish and as a sanding sealer, which evens out the layer of a sanded wood before it is finished. Heavier cuts of shellac than sanding sealer can be used as a top finish, but I have found this to be most doable on porous, worn wood surfaces, like an old bench I refinished– that does not get heavy wear. It has a lovely sheen.
Stay tuned for more tips about DIY and home rehab business.
Handbuilt officially thinks Jeff Bezos should be shot into the sun on one of his Blue Origin rockets, but receives a referral fee if you buy something through the link to Tried & True Wood Finishes, which are made in the very long state of Pennsylvania out of all-natural, nontoxic, zero-VOC ingredients. This article was updated on October 26 to include some sage wisdom from Josh Hudac of Tried & True Wood Finishes.